|
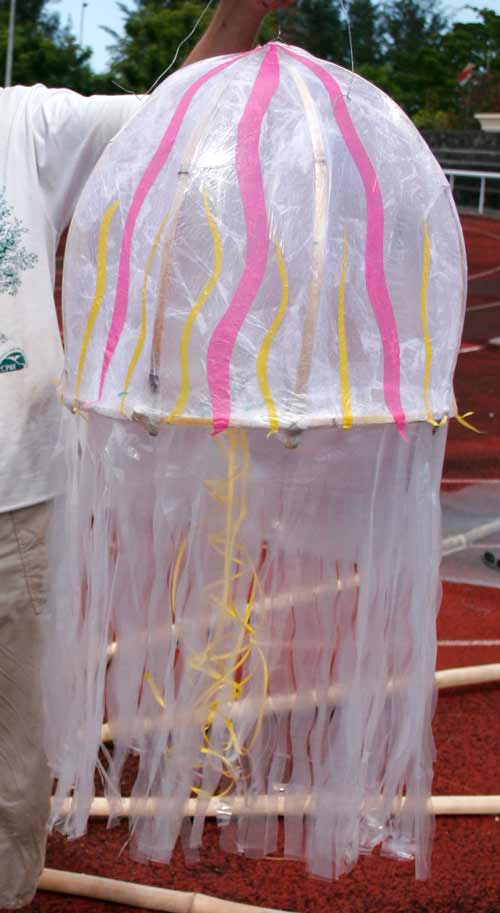
| Large Jelly fish lantern. Photo by Y. Gomez |
I’ve written previously about
how to make fish lanterns, now it's time to make jelly-fish lanterns!
At the time, the jelly-fish idea was a response to the following:
- How to make fishy-themed lanterns with a very simple shape (we had to make a lot very quickly, with the help of children.)
- And how to recycle a lot of plastic bags. The football field the show was being performed on had been covered in blue tarpaulins (to make it look like the sea), and they’d all come in plastic bags that looked ripe for re-use.
Although we used split green bamboo, you will be able to follow this design exactly using willow withies which are more readily available for a lot of people. Here’s a few links to suppliers in the UK, but search for buff willow, or willow withies and you’ll find them.
Soak the willow for 2-4 hours to help with flexibility.
 |
| Splitting bamboo. Photo by Y. Gomez |
If you want to use bamboo, it must be relatively freshly cut, and split down its length to give you long thin strips about 1cm (3/4 in) wide. If splitting the bamboo with a machete be careful of your hands and arms – bamboo can be very sharp (and so can the machete!) A huge thank you to all those people who split the bamboo for us (Louis particularly!) – we couldn’t have done it without you!
You will need:
- A small amount of chicken wire or small shallow tin can.
- Pliers and wire cutters
- Small tinfoil pie cases or tinfoil.
- Willow withies or split green bamboo.
- Thin wire
- Masking tape and clear tape (eg sellotape)
- Secateurs or something else to cut the withies.
- Scissors
- Cling film
- PVA glue (non-washable) watered down so it can penetrate the tissue paper
- An old paint brush to apply the glue.
- Wet strength tissue paper, about 2-3 sheets per jellyfish, but it depends on how big the jellyfish is!
- Tealight candle or other light source (eg glow stick, LED pushlight, torch.)
- An old bit of plastic to cut up for the tentacles.
 |
| Candle holder |
Candle holder:
Make your candle holder first. (An old (washed) sardine tin works well, but we made ours from chicken wire as it was easier to get hold of.) This bit isn’t recommended for kids as the wire can be sharp.
Make a small cylinder shape from chicken wire and attach the ends together so the shape doesn’t spring apart - Use wire or just bend over parts of the chicken wire. Snip the chicken wire apart, from the bottom of the cylinder upwards about a third, and bend some of these bits inwards to create a bottom and some outwards to create ‘legs’.
Put a tinfoil pie case in the bottom or just create a lining at the bottom with tinfoil – this is to stop any wax from dripping out of the bottom of the lantern. Set to one side and make the frame.
 |
| The first ring - this is the base of the body |
Making the lantern frame:
Make a ring with withies/bamboo that is going to be the base of the jelly fish lantern body. Ours averaged about 25 - 30cm (12in) in diameter (so use a withy that is roughly a metre long (approx. 40 inches) (Although the one in the first picture is much bigger than that).
Overlap the ends of the withies/bamboo and tape with masking tape to hold.
 |
| Add a cross, to fit the candle holder onto later |
Add a cross of withies/bamboo on top of the ring and tape in place.
 |
| Start making the body shape |
Cut 3 or 4 lengths of withy/bamboo that will make the shape of the body. Our lengths were about 60cm (24in) long. Attach one end to the edge of the frame, then curve it to attach the other end to the opposite side of the ring.
 |
| Work your way round until all the body bits are attached. |
Repeat until you've attached all your body-pieces, keeping them evenly spaced around around the ring.
 |
| Fit candle holder |
Fix the candle holder to the cross of the base by folding its ‘feet’ under the withies/bamboo. Use extra wire if it looks a bit wobbly. Try not to have any wire poking out anywhere as you will eventually put your candle in from underneath. I must admit, you can wait to do this bit last if you want, you'll see in some of the subsequent photos that we're putting the cling film on and the candle holder is nowhere to be seen. Out of preference I would do it at this stage, but it's not essential.
 |
| Fatima putting cling film on a nice big jelly fish! Photo byY. Gomez |
 |
| That's me, helping with the cling film. Photo byY. Gomez |
Covering the frame:
When working with small or inexperienced hands, I find it useful to cover the frame with cling film first, before covering with tissue paper. This just gives a base to attach the tissue paper to, but is not strictly necessary. Adults may want to help with this bit! Make sure there’s no cling film bits dangling inside the lantern that may melt in the candle-flame, pat it all flat on the inside.
 |
| Getting the paste on, lots of messy fun!. Photo by Y. Gomez |
Then the messy part begins! Tear the tissue paper into pieces small enough for your lantern and set aside. Water down pva glue and use old paint brushes to apply it to the tissue paper.
Stick it onto the lantern overlapping the edges of each piece until the whole lantern is covered.
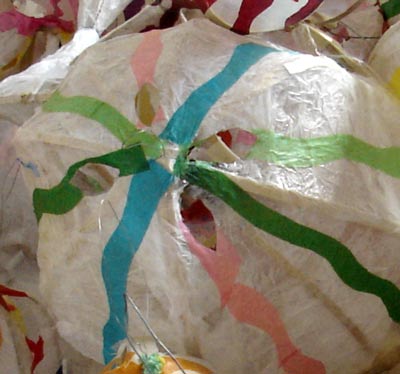
It’s best to use white tissue paper for a base and add a few colours on top of that, rather than do the whole thing in colour – it helps the light transmission.
 |
| Adding the finishing touches. Photo by Y. Gomez |
Once all your jelly-fish patterns are applied, leave it to dry.
Now is a good time to cut up the plastic you have to make the tentacles. Cut it in thin strips, but not all the way through. Leave about 25mm (1in) at one edge that will keep the whole thing together so you can attach it to the lantern as one big fringe. Then (obviously) attach it to the base ring of the lantern. Clear tape works well.
Cut vent holes:
If you’re using real candles for your light source, cut out a few small holes above the candle holder, (on top of the jelly-fish’s head) to provide a vent hole for the heat to escape. Scissors or a sharp knife works fine.
 |
| Vent holes for the heat to escape. |
And finally, add a handle by attaching wire to the top withies/bamboo, and insert a lit candle from underneath, by dropping it into the candle holder. If you struggle getting the candle in, you can cut a little ‘door’ in the side and then just tape it closed with clear tape.
As with all candles, it’s best not to leave them unattended, especially if the lanterns are being carried by children.
Other light sources, like torches or glow sticks can be hung from the frame on the inside.
 |
| Some finished jelly fish lanterns. |
 |
| Lighting the candles backstage before the show. Photo by Y. Gomez |
 |
| Poster for the Kreol Festival Seychelles, 2005 |
Lastly a huge thank you to all the people that helped us make and light the 200 lanterns for this opening show of the Kreol Festival, it would not have been so spectacular without you!