
 |
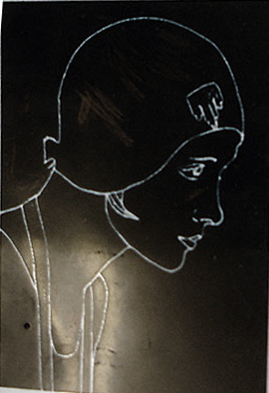
| A photo of one of the acetates used. |
So I thought I’d share the fun I had learning how to etch using Ferric Chloride last weekend. Thanks to Zoe and her dad for going over the basics with me!
I know there’s folks that know more about this online, so this isn’t supposed to be a comprehensive description of how to do it, but a perspective from an absolute beginner on how to get started. (Although to be fair I had a good head start as I borrowed all the equipment..)
To summarise the process (I’ll write a full description with photos and suppliers afterwards):
- We printed out the black and white image onto acetate, making it the same size as the metal to be etched.
- We cleaned the surface of the metal with wet and dry paper and FLU (usually used for circuit boards I understand), but isopropyl alcohol would work the same.
- The surface of the metal was then evenly sprayed with a good coat of Photo Resist spray.
- It was then baked in an oven for 20 mins at 50 degrees C to set the photo resist, then put in an anti-static black bag to protect it from the light whilst moving it about and preparing the light box.
- The acetate was carefully laid onto the prepared metal plate and exposed to light. We actually used a vacuum-plate to make sure there was no air between the image and the plate, then timed the exposure to UV really carefully.
- Once exposed we then put the acetate to one side and used developing liquid to develop off the exposed part of the photo resist.
- After rinsing, this was then gently agitated, upside down, in a ferric chloride bath, that was sitting in warm water. Probably should mention that you should avoid getting it on your skin or clothes, it’s not very nice stuff. After getting up close and personal with this stuff I can honestly say an apron, protective chemical-proof gloves and goggles are recommended. And I know it’s obvious, but with all nasty chemicals, store out of reach of children and away from pets. The developing liquid is not as bad, but best to be over cautious.
- You have to keep checking how deep the etch is taking, by having a quick peek, but a few minutes was enough for the small ones we were doing.
- We then rinsed the metal plates with water, and cleaned the photo resist off with wet and dry paper.
 |
| The final etched plate after rubbing paint into the etch and lacquering. |
- Technically that’s the etching process done, but it looks nice if you rub something black like paint into the surface and rub it off – the black sticks in the etch making it show up more. Then the plate should get cleaned with metal cleaner and lacquered to prevent tarnishing.
Originally I thought Zoe had just got this image off the internet, but it's one of her very own. Here's a link to her folksy shop so you can see some of her other work: http://www.folksy.com/shops/Zfarley1,
Zoe's Etsy shop is here: http://www.etsy.com/people/CraftBunker,
and her Mudpool shop is here: http://mudpool.co.uk/SellerDetails.aspx?Id=280&vw=Items
and her Mudpool shop is here: http://mudpool.co.uk/SellerDetails.aspx?Id=280&vw=Items
Right, in the next post I'll write the more in depth version of the process we followed with photos and suppliers!
No comments:
Post a Comment