OK, so for those of you who want a more in depth description of this etching lark..
So the first thing to do is to make your artwork the right size and get it onto acetate. We printed it from a computer using an inkjet printer. This is used to block areas of light when exposing it under a light box later, but there is no toner transfer onto the boards so it doesn’t matter which side of the transparency the image is on or whether you use a laser or inkjet printer.
 |
| Artwork ready for process |
The image must be black and white with the white areas being the parts that you’d like etching. The black part of the image should extend to cover the edge of the metal otherwise you’ll use up etching solution needlessly. The process works better with very clear and well defined black and white images. Areas of grey in the original artwork tend not to work so well.
Oh, and we discovered that getting your acetate wet isn’t a good idea – it removes the ink, so avoid handling your acetates with wet hands/spilling tea on them etc.
 |
| Cutting boards down on the guillotine |
You may also need to cut your boards down to size to match your artwork. We used a metal guillotine, but I’m sure a hacksaw would have worked just as well. I can recommend splitting designs up, so there’s only one per board, and keeping designs small until you’ve got the hang of it.
It seems there’s a lot of variables that can affect the process and it’s easy to change the outcome by mistake. Something that might help could be a tester strip of metal with a matching acetate that is purely used for testing the exposure levels. This will need to be prepared at this stage if you’re going to use it, I’ll explain more about this as we go along.
 |
| Plate that wasn't prepared properly. |
Right, the next stage is super important unless you want some slightly unpredictable arty effect. The image to the right is what happens if the plate isn’t cleaned properly before spraying with photo-resist…
 |
| Clean your plates! |
So, clean clean clean! We used 1000 grit wet and dry paper to lightly sand the surface in small circular movements. After drying the metal, we wiped it with a product called FLU, used for PCBs, but isopropyl alcohol works the same. Use a lint-free cloth if you can, we found that even the slightest bit of dust on the surface at this stage can affect the quality of the final piece. This also includes finger prints. We were being really careful and still managed to get a hair on one of them!
Put your beautifully prepared metal sheets/boards on some small blocks of wood, so that the edges overhang - this is not essential but it makes the boards easier to pick up without touching the surface.
 |
| Spray plates with photo resist |
 |
| Photo resist |
Wearing a mask that will protect you from toxic vapour, spray the photo resist evenly onto all the boards at once. It goes a dark green so you can see it. Any uneven spraying will mean uneven etching, so be careful to get it right.
The wavelength of the light that affects the photo resist will be on the packaging somewhere. All light outside of that wavelength are ok to use as lighting when preparing the exposed boards. So, for ours, a normal incandescent light bulb in the oven is ok, but doing the process in a room lit with daylight probably isn’t.
 Basically light from the UV end of the spectrum should be avoided at this stage. For the photo resist to properly cure, ours could be left in a totally dark place for 12 hours, or baked in a low oven.
 This stuff stinks and is probably really toxic so DON’T put it in same oven you use for food. No really, don’t even consider it. We used one of those small table top ovens that is only used for this purpose. We cooked all the plates together at 50 degrees C (122 degrees F) for 20 mins. Like all odd cooking experiments it’s probably wise to set a timer.
 |
| Protect the plates from daylight/uv light. |
After ‘cooking’ the plates let them cool down a bit, then put them in something to protect them from light. We used an anti-static black bag usually used for electronic components but the kind of bag unexposed photography paper comes in would work the same. So would most clean containers with a lid.
 | |||
| Vacuum plate with artwork |
So the next stage is layering up the acetate and the plate and exposing it to light. It might be ok if you just put one on top of the other and put it in a light box, but the less air between the image and the plate, the better the image quality will be. We happened to have a home-made vacuum plate type device at hand (thanks to Zoe’s Dad) and the set up was like the drawing below.
I think in the light boxes you can buy, the light source is at the bottom and so the whole thing is flipped upside down. The ones you can buy allow the lid to rest on the artwork so I think this eliminates the need for a vacuum plate, but maybe someone that's used one can help me with this point?

Remember that it’s better to handle the plate in light that will not affect the photo resist, so avoid sunlight or UV light.
Now is the time to work out how long to expose your pieces for. The main variable factor in this whole process seems to be the relationship between the amount of photo resist sprayed onto the surface and the amount of light to expose it to. The quality of the artwork also has a bearing, but generally, the clearer and more defined the image, the better the outcome.
So get your tester strip, or the artwork that is least important, and for this one only, stick the artwork to the plate using a small amount of clear tape. Then, get your stopwatch ready and with the exposure light on, gradually cover it up in small sections that are timed at equal intervals eg From 2 minutes, cover the strip incrementally every 30 seconds.
This exposes different parts of the strip to different amounts of light to give you an idea of how much to expose all your other plates for the optimum exposure. Maybe you could make the artwork for the test strip read the amount you are going to expose it for under the light. So you don’t have to remember it later – it’s burnt into the board.
 |
| Our 'tester' strip |
There’s various ways of exposing your plates to light, most people probably end up making a box, as the alternatives can be pricey. Here’s one that RS Components sell: http://uk.rs-online.com/web/search/searchBrowseAction.html?method=getProduct&R=0555279 for £147.56, but here’s instructions on how to make one if you’re that way inclined: http://www.electronics-lab.com/projects/mcu/010/index.html
 |
| Developing the plate. Notice the 'smoky' surface. |
Anyway, after exposure, put it back it into its protective anti-light cover and get ready to develop it.
We used ‘Universal Developer’ from RS, mixed up with de-ionised water. Put the test strip/plate into a shallow tray containing the developer face up, and agitate slightly. You will see the surface start to change, It’s hard to describe, but it looks kind of smoky. We found light stroking over the surface of the plate helped the process along.
When the surface has stopped ‘smoking’ it has stopped developing and you can rinse it in water.
 |
| Putting masking tape on back |
Then dry it, and put masking tape over the whole of the back surface with a long overhang on both sides that you can use as ‘handles’. This stops the etching fluid eating into the plate from the back. I had my doubts about masking tape, I thought we’d have to use stronger tape, but it worked just fine.
 |
| Agitate gently updside down in Ferric Chloride. |
Now it’s time for the etching! Ferric Chloride works quicker if it’s a bit warm, so we used a small tray of ferric chloride suspended in a larger tray of recently boiled water. You can get the trays, ferric chloride and all sorts of useful other stuff from RS Components: .
They even sell ferric chloride stain remover, which you will probably need unless you wear an apron or some old clothes , it’s horrid stuff. With that in mind I can recommend wearing gloves and goggles, which stupidly we didn’t. Zoe tells me that it hurts if you get it in a cut…um…I think I’ll be avoiding all skin contact with this stuff in the future!
Anyhow, you want to be holding your tape handles and suspending it upside down (ie the side to be etched should be DOWNWARDS) in the ferric chloride, agitating it very slowly. If you don’t agitate it, it won’t etch so well.
 |
| Rinsing the plate. |
Keep checking it to see how deep the etch it going. Obviously with the tester strip it will etch different amounts according to how exposed the plate was at various points. Continue until you have an area you are happy with and then rinse it with water to stop the etching process.
· We then cleaned the photo resist off with wet and dry paper.
 |
| Final clean with wet and dry |
Whichever part of the test strip came out the best, expose all your other plates for the same amount of time under the light and repeat the developing and etching process.
If any plates don’t develop satisfactorily, try putting them back in the developing liquid, if that doesn’t work, and the developing liquid has been used before, try using fresh developing liquid. Or as a last resort, try lining up the artwork again and re-exposing it.
This is an example of artwork that didn't work out so well - this scratchy font didn't work in a consistant way. This has been tried a number of times, so I don't think it was just from this one occasion. You can see that the C hasn't etched as deeply as the B. (This plate is a just a thin layer of copper with a black layer underneath that is exposed when the ferric chloride eats away at the copper.)
 |
| Artwork |
 |
| Final plate |
 |
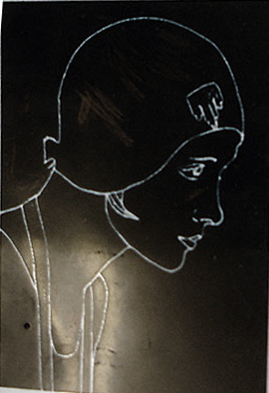
| Artwork (apologies for a slightly fuzzy photo) |
 |
| Final plate. Zoe calls it the 'Hypno-Toad'. |
We got this image from the internet, and if anyone knows who the original artist is we will gladly give them the credit they deserve.
This last plate is solid brass and so we rubbed black paint into it to make the etch stand out. We then cleaned the excess paint off with Brasso (metal cleaner) and lacquered it with clear spray lacquer (available in automotive refinishers or craft shops) to prevent tarnishing.
And that's the end of this little experiment! We're no experts, this is just a description of our experience, but maybe it will help someone trying to figure the process out!
Suppliers for our more unusual materials used were (all UK based):
RS Online: http://uk.rs-online.com/web/home.html