How to Make a Rose in Polymer Clay (Fimo)
Today I am going to show you how to make a rose using polymer clay or FIMO.
This technique can be used with all sorts of different materials such as clay, plasticine, paper and even icing sugar paste! (The stuff you can roll out flat).
The same technique applies to all materials, but in the case of the sugar paste you might need to use a little water to adhere the rose petals together. With paper, glue can be used.
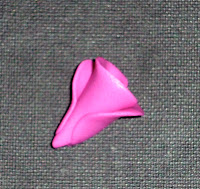
I have decided to use a very vibrant pink colour Fimo today, for no other reason than the fact that I like it!
 |
| Petals in progress |
The more petals you have the bigger the final rose will be.
 |
| Curl a petal to make the centre |
Once you have your Fimo petals, take one and roll it in on itself as shown on the right.
 |
| Petal centre |
This is your flower centre, so the tighter it is rolled, the smaller and more delicate the flower will be.
 |
| Wrap petals on centre to make rose |
You will then need to wrap another petal around, but on the opposite side, so to give a bit of balance to your rose. Always remember to keep the thin edge at the top!
 |
| Flower takes shape |
Keep applying the layers in this way, using your artistic flare to make the rose grow in the way you want it to.
If you are making the rose out of paper, try to avoid glueing near the top, as this would make the petals harder to bend into shape.
Once you are happy with the way your rose looks, you will probably need to trim the bottom to tidy up where the layers have been applied. Once trimmed, gentle tweak the edge of the petals, creating ripples and giving the flower movement and shape.
To fix the shape of the polymer clay, place it into a pre heated oven at 110 degrees Celsius for about 35 mins.
Alternatively bake it for 30 mins at 140 degrees Celsius. If it is baked for less time/lower temperature it is more likely to end up slightly brittle and the end result would be fragile.
The finished item could be varnished with clear acrylic varnish and made into a brooch, present decoration, magnet, birthday card - options are endless as they say!
Thanks for reading!


No comments:
Post a Comment